When my family decided to build an accessory dwelling unit (ADU) in our California backyard, we had three goals: make it legal, make it livable, and make it affordable. Easy, right? Not exactly. But with the right help and a whole lot of planning, we turned a patch of dirt into a fully functioning, income-generating home—without blowing the budget.
Here’s our step-by-step story, built with the same integrity and grit you’d expect from kind of project. This is how we tackled affordable ADU construction options in California, one smart decision at a time.

Step 1: Start With the Permits (Yes, Really)
Before anything else, we met with our city’s planning department. In California, ADU regulations vary by city and county, but thanks to state-level support, the process is easier than it used to be. Still, you’ll need:
- A site plan
- A clear understanding of zoning setbacks
- Utility access details
- Approval from the building department
Pro Tip: Hire a draftsperson familiar with local ADU code. It saved us time—and money.
Step 2: Line Up Your Team
Even prefab builds require pros. We hired:
- A licensed general contractor
- An electrician and plumber (licensed!)
- A soils engineer for foundation prep
- A permit expeditor (worth it in California)
Don’t skip this step. The right team makes or breaks your build.
Step 3: Choose Your ADU Type Wisely
We considered prefab, garage conversion, and new-build options. Here’s what we found:
| ADU Type | Cost Range | Pros | Cons |
|---|---|---|---|
| Garage Conversion | $60K–$100K | Uses existing structure | Limited layout options |
| Prefab ADU | $80K–$150K | Faster build time | Transport/install limits |
| Stick-Built (New) | $100K–$250K+ | Fully customizable | Higher labor cost |
We chose a prefab model to balance speed, budget, and customization. It came with pre-set designs, but we made a few upgrades to fit our needs.
Step 4: Manage the Budget Without Cutting Corners
Here’s where it gets real. Our all-in costs landed just under $140,000. Here’s how we kept it affordable:
- Chose durable, mid-range finishes (LVP flooring, solid-core doors)
- Reused our existing sewer and water tie-ins
- Handled landscaping ourselves
- Skipped unnecessary add-ons (no skylights, no custom millwork)
What we didn’t cut? Quality materials or licensed labor. That’s a mistake you’ll pay for later.
Step 5: Install and Inspect
Installation took just 10 weeks. The city did three inspections:
- Foundation
- Rough-in (plumbing, electrical)
- Final walk-through
Everything passed the first time, thanks to careful prep and a contractor who played by the book.
From Concept to Cozy Living
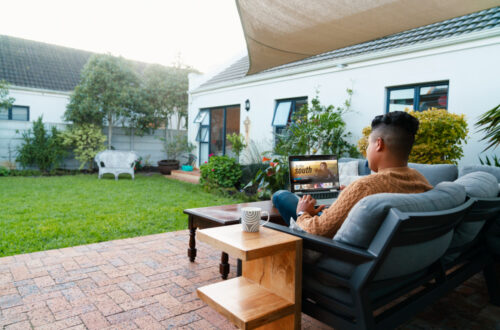
Today, our ADU is a 480-square-foot guesthouse with full kitchen, bath, and private entrance. It’s used by visiting family, and when vacant, we rent it as a short-term stay. It’s already helping pay for itself.
And that little porch light we installed? Flips on every evening. A signal that this space—once just a budget idea—is now a full-fledged part of our home.
✅ Call to Action
If you’re considering affordable ADU construction options in California, don’t wing it—build it right. With smart planning and the right team, you can create something that adds value, comfort, and income to your property.
Talk to our team today to explore your ADU possibilities—and let’s build something you’ll be proud of, from permit to porch light.